You’ve seen it a thousand times. You watch a Hollywood blockbuster and then look at your own footage, only to feel a sinking sense of disappointment. Even if you’re shooting on the latest 4K mirrorless camera, your video looks “thin,” “cheap,” or—worst of all—like a home movie.
There is a persistent myth in the industry that the “Film Look” is a product you can buy. Many believe that if they just had an Arri Alexa or a RED V-Raptor, their images would suddenly possess that elusive, visceral power.
This is a lie.
The truth is that a $50,000 camera in the wrong hands will still produce amateur results. Conversely, a master cinematographer can pick up an iPhone and create a frame that feels like it belongs on a cinema screen. Achieving the “Film Look” is not about your credit limit; it is about a sacred workflow that bridges the gap between technical settings and narrative artistry.
In this guide, we will shatter the myths and unlock the secrets of cinematic cinematography. Whether you are using a smartphone, a budget DSLR, or a high-end cinema rig, you are about to learn how to transform “video” into “cinema.”
Key Takeaways
- Motion is Foundational: Mastering the 180-degree shutter rule and 24fps is the non-negotiable first step.
- Lighting over Resolution: Cinematic images are defined by shadow and contrast, not pixel count.
- The “Digital Edge”: How to use vintage glass and diffusion filters to soften modern sensors.
- The Post-Production Darkroom: Moving beyond LUTs to professional color grading and film texture emulation.
- Story-First Mentality: Why production design is the most overlooked element of the “Film Look.”
Table of Contents
- The Technical Foundation: Motion & Shutter
- Mastering Optics: Lenses and Depth of Field
- The Secret Sauce: Lighting & Production Design
- The Digital Darkroom: Post-Production & Texture
- Specific “Any Camera” Workflows
- Expert/Insider Tips: On-Set Hacks
- Conclusion: Story Over Spec Sheets
- Frequently Asked Questions
I. The Technical Foundation: Motion & Shutter {#the-technical-foundation-motion–shutter}
The 24fps Standard: The Pulse of Cinema
Why does 24 frames per second (fps) look like a movie, while 60fps looks like a news broadcast or a video game? The answer lies in the history of the medium. Early filmmakers experimented with various frame rates, but 24fps was eventually standardized by Kodak and the industry because it was the minimum speed required to provide smooth motion and synchronized sound while remaining cost-effective for film stock.
Psychologically, 24fps provides a “dream-like” quality. It isn’t a perfect representation of reality; it is a stylized version of it. When you shoot in 30fps or 60fps, the motion is “too real,” which leads to the dreaded Soap Opera Effect. If you want your audience to stay immersed in your story, you must shoot at 23.976 or 24 frames per second.
The 180-Degree Shutter Rule
Motion blur is the “glue” that holds your frames together. If your shutter speed is too fast, your footage will look jittery and “staccato” (think the opening beach scene in Saving Private Ryan). If it’s too slow, your footage will look smeary and drunken.
The 180-Degree Shutter Rule is a mathematical formula used to achieve “organic” motion blur:
Shutter Speed = 1 / (2 x Frame Rate)
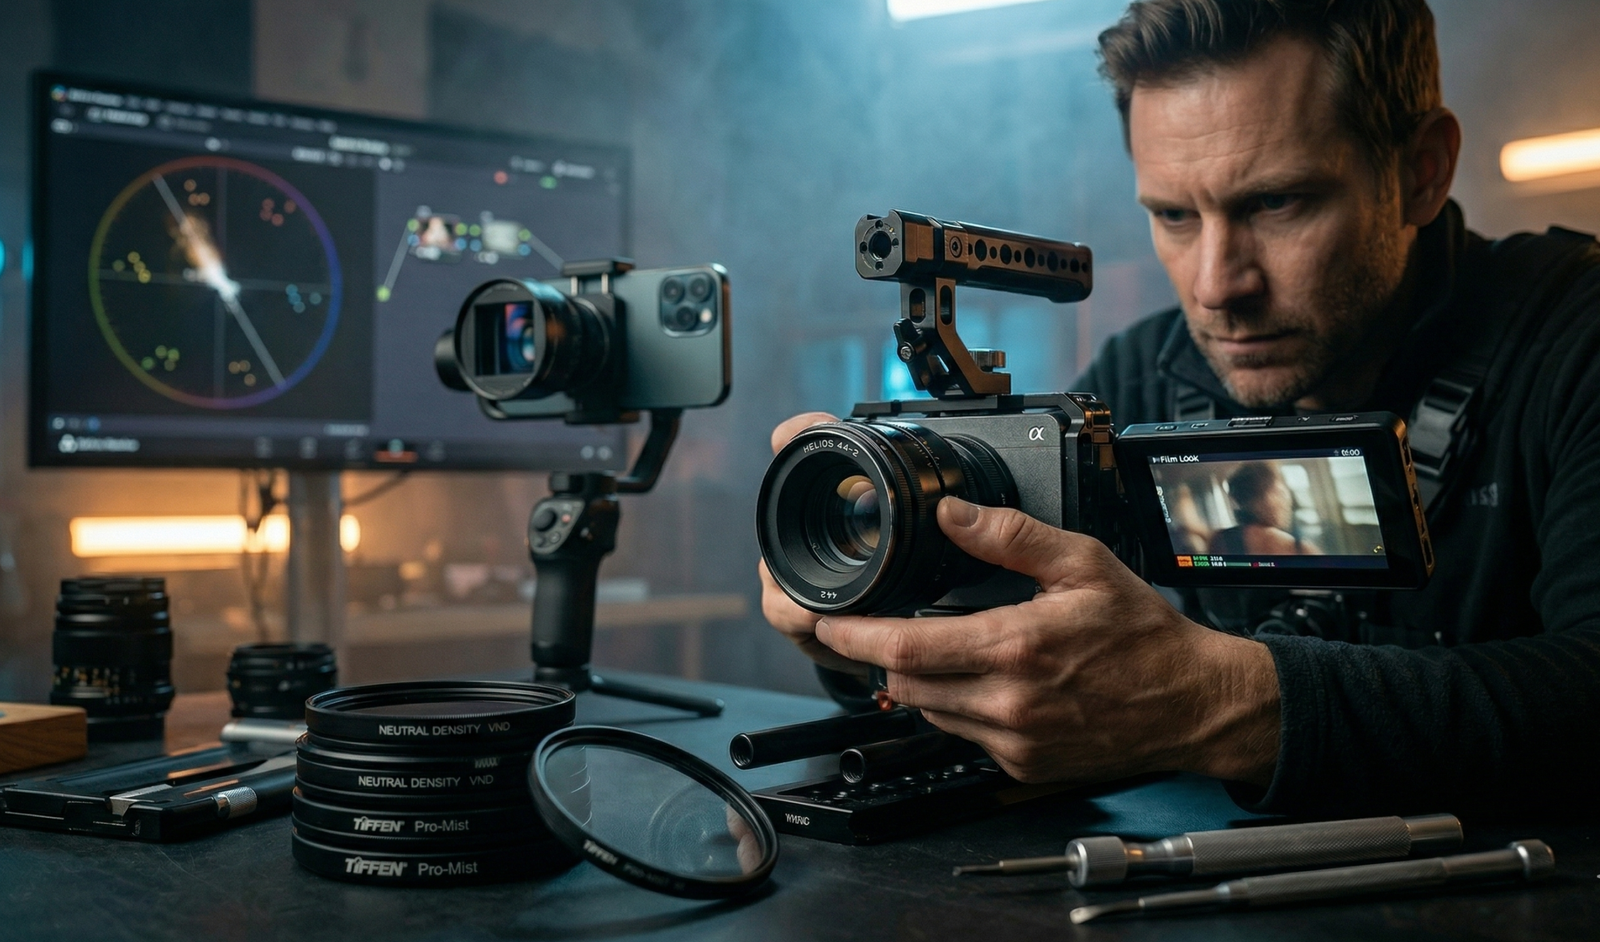
If you are shooting at 24fps, your shutter speed should be 1/48th of a second (or 1/50th on most digital cameras). This creates a blur that mimics how the human eye perceives movement. To maintain this shutter speed outdoors in bright light, you will need a Neutral Density (ND) Filter, which acts as sunglasses for your lens, allowing you to keep your shutter at 1/50th without overexposing the sensor.
Combating the “Soap Opera Effect”
Modern televisions often come with “Motion Smoothing” or “Frame Interpolation” turned on by default. This digital processing adds fake frames to your 24fps footage, making it look like 60fps. As a filmmaker, it is your duty to educate your audience or ensure your deliverables are formatted to discourage this. The “Film Look” is a delicate ecosystem—don’t let a TV’s factory settings destroy your hard work.
II. Mastering Optics: Lenses and Depth of Field {#mastering-optics-lenses-and-depth-of-field}
The Bokeh Fallacy
Many beginners believe that a “cinematic” shot is simply a shot with a very blurry background. This is a trap. While a shallow depth of field can help isolate a subject, overusing it can make your film look like a wedding video.
True cinema often uses a deeper depth of field to show the character’s relationship with their environment. Master directors like Stanley Kubrick frequently shot with wider apertures to keep the production design in focus. Use depth of field as a narrative tool, not a crutch to hide a bad background.
Vintage Glass on a Budget
Modern lenses are often too sharp. They are designed for clinical perfection, which can make digital sensors look “video-y.” To combat this, many cinematographers are returning to vintage lenses.
Lenses from the 1960s and 70s, such as the Canon FD series or the legendary Helios 44-2, possess unique “imperfections”—lower contrast, beautiful flares, and a softer highlight rolloff. Because of their manual nature, you can easily adapt them to modern mirrorless systems like Sony, Canon, or Panasonic. These lenses add a “soul” to the image that digital sharpening can never replicate.
Lens Compression & Focal Lengths
The lens you choose dictates the emotional weight of the shot.
- Wide Lenses (14mm – 24mm): Create a sense of scale or isolation. They can also feel intimate if the camera is physically close to the subject.
- Long Lenses (85mm – 200mm): Create lens compression, making the background appear closer to the subject. This is excellent for “hero shots” or creating a sense of claustrophobia.
Diffusion Filters: Softening the Digital Edge
If you can’t afford vintage lenses, use a Diffusion Filter (such as a Tiffen Pro-Mist or Black Magic Filter). These filters scatter light before it hits the sensor, blooming the highlights and softening skin tones. This emulates the way light behaves on actual film stock, reducing the clinical “digital” look of modern 4K and 8K sensors.
III. The Secret Sauce: Lighting & Production Design {#the-secret-sauce-lighting–production-design}
Motivated Lighting
The biggest giveaway of amateur footage is “unmotivated” light—light that seems to come from nowhere. In cinema, every light source should have a “reason” for existing. This is called Motivated Lighting.
If your character is sitting at a desk, the light on their face should appear to come from the desk lamp or a nearby window. Even if you are using professional LED panels like those from Aputure, your goal is to hide the artifice.
Shooting the “Shadow Side”
To create a three-dimensional, “filmic” image, you must embrace shadow. Amateurs often light the side of the face closest to the camera. Professionals light the “far side” of the face (the side away from the camera), leaving the side closest to the lens in shadow. This is often referred to as Rembrandt Lighting.
Use Negative Fill (a black flag or piece of foam core) to soak up bouncing light and deepen your shadows. Cinema is the art of what you don’t see.
Color Theory on Set
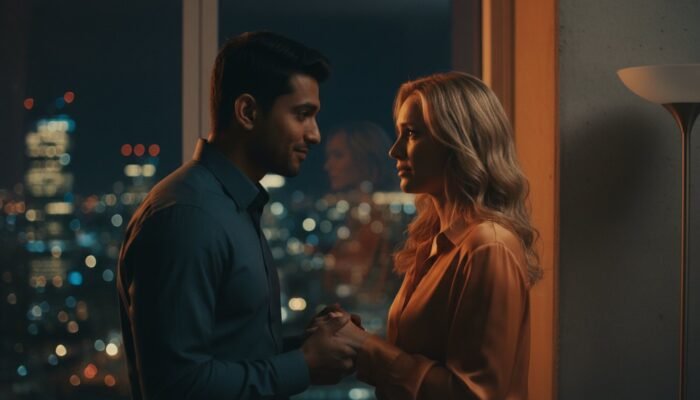
The “Film Look” starts in the wardrobe and on the walls, long before you reach the editing suite. Avoid white walls at all costs—they reflect light everywhere and look “cheap.” Instead, use a controlled palette. The famous “Teal and Orange” look isn’t just a color grading trick; it’s a result of using complementary colors in Production Design. If your character is wearing a warm-toned sweater against a cool-toned background, the “cinematic” separation happens naturally.
IV. The Digital Darkroom: Post-Production & Texture {#the-digital-darkroom-post-production–texture}
Shooting in LOG vs. Rec.709
To get a professional look, you must maximize your camera’s Dynamic Range. Shooting in a LOG profile (like S-Log3, V-Log, or C-Log) produces a flat, grey image that preserves details in both the brightest highlights and the deepest shadows. While this requires more work in post-production, it prevents your sky from “clipping” to pure white, which is a hallmark of low-quality video.
The 3-Step Color Workflow
Do not just “slap a LUT” on your footage. Follow the professional workflow:
- Normalization: Convert your LOG footage to a standard color space (Rec.709).
- Color Correction: Fix the white balance, exposure, and contrast so the image looks “real.”
- Color Grading: This is where you apply the “look”—the creative tinting and mood that tells the story.
Software like DaVinci Resolve is the industry standard for this process.
Adding “Organic” Imperfections
Digital footage is too clean. To achieve the “Film Look,” you must reintroduce the characteristics of physical film:
- Film Grain: This is not “noise.” Real film grain is textural and moves organically. Use high-quality overlays or plugins like Dehancer.
- Halation: This is the red glow that appears around high-contrast edges in film. It happens when light reflects off the back of the film base.
- Bloom: The soft glow in the highlights that gives images a “dreamy” quality.
Aspect Ratios: The Shape of Cinema
While 16:9 is the standard for TV, the “cinematic” standard is often 2.39:1 (Anamorphic). However, don’t just add “black bars” for the sake of it. The aspect ratio should serve the story. A wider frame is great for landscapes and westerns, but a tighter 1.33:1 (Academy Ratio) can create a sense of intimacy or nostalgia.
V. Specific “Any Camera” Workflows {#specific-any-camera-workflows}
Smartphone Filmmaking
Your phone is a powerful tool, but its internal software is designed to make things look “sharp” and “bright”—the opposite of cinema. Use an app like Blackmagic Cam or Filmic Pro to unlock manual control over your shutter speed, ISO, and white balance. Pair it with an anamorphic lens attachment from Moment for true cinematic flares and a wider field of view.
Action Cams & Drones
Drones often have very high shutter speeds by default, making the footage look like a “soap opera.” Use ND filters on your Mavic or GoPro to force the shutter speed down to 1/50th. This creates motion blur in the ground as it passes by, making the flight feel much more cinematic and fast.
Budget DSLRs (8-bit Color)
If you are shooting on an older camera with 8-bit color, avoid pushing your colors too far in post-production, or the image will “break” (banding in the sky). Instead, get the look as close to perfect as possible in-camera using custom picture styles.
VI. Expert/Insider Tips: On-Set Hacks {#expert-insider-tips-on-set-hacks}
- The “Curtain Trick”: If you are shooting a seated interview, don’t use a ring light. Place your subject near a window and hang a thin, white shower curtain over it. This creates a massive, soft light source that looks like a multi-thousand-dollar softbox.
- The “Slow Zoom”: If your shot feels static, use a “digital punch-in” in your editing software. A subtle 105% to 110% zoom-in over the course of a shot emulates the slow, deliberate movement of a cinema dolly.
- Sound is 50% of the Look: This sounds counterintuitive, but humans are “fooled” by their ears. If you have cinematic, high-fidelity audio with deep room tones and crisp foley, the viewer’s brain will actually perceive the image quality as being higher. Never use the built-in microphone.
VII. Conclusion: Story Over Spec Sheets {#conclusion-story-over-spec-sheets}
The “Film Look” is ultimately a philosophy of restraint. It is the choice to use less light, to allow shadows to exist, to embrace the “imperfections” of vintage glass, and to respect the history of the 180-degree shutter rule.
Whether you are shooting on a $1,000 Canon or a $50,000 Arri, the principles remain the same. The camera is simply a box that records light. You are the one who dictates how that light is shaped. Stop waiting for the “perfect” gear and start mastering the sacred workflow of cinematography.
Forge Your Own Cinematic Vision at Cinemastery Academy
If you are tired of mediocre results and are ready to turn your passion into a career, the path to mastery starts here. At Cinemastery Academy, we don’t just teach you which buttons to press; we teach you how to see the world like a Director of Photography. From advanced lighting setups to the psychology of color grading, our masterclasses are designed to help you find your unique voice in a crowded industry.
Start your journey at Cinemastery Academy today.
FAQ {#faq}
Q: Can I get a film look on a 1080p camera?
A: Absolutely. Most of the greatest films in history were shot on 35mm film, which—when scanned—often has a perceived resolution closer to 2K than 4K. Resolution is the least important factor in the “Film Look.” Lighting, frame rate, and lenses are far more critical.
Q: Do I need LUTs to look cinematic?
A: No. A LUT (Look-Up Table) is a tool for speed, not a magic fix. If your lighting and exposure are bad, a LUT will only make it look worse. Learn to color grade manually first, then use LUTs to streamline your workflow.
Q: Why does my video look shaky?
A: There is a difference between “Handheld Organic” motion and “Digital Shake.” Cinematic handheld movement often involves a heavy camera rig or a gimbal used with a “ninja walk.” Micro-jitters from lightweight cameras or smartphones scream “amateur.” Use a tripod or a weighted shoulder rig to add “intentionality” to your movement.
Q: Does 4K make a video look more cinematic?
A: Usually the opposite. Excessive sharpness is the enemy of the film look. Many cinematographers actually “downscale” their 4K footage to 1080p or add blur in post-production to take away the clinical digital edge.
Q: What is the most important piece of gear for the film look?
A: A set of Neutral Density (ND) filters. Without them, you cannot maintain the 180-degree shutter rule outdoors, which is the absolute foundation of cinematic motion.