If you’re serious about filmmaking, this ultimate guide to capturing high quality field audio for film will change how you approach every production. A striking 91% of consumers say video and audio quality directly impacts their trust in a brand or production, which means bad field audio doesn’t just sound unprofessional — it actively destroys credibility with your audience before a single line of dialogue lands.
Table of Contents
Key Takeaways
- Location scouting for audio is non-negotiable: Always visit locations before your shoot day to identify noise sources, reverb problems, and electrical interference that will ruin recordings.
- Microphone selection determines your baseline quality: A supercardioid or hypercardioid shotgun mic on a boom pole is the standard for capturing clean dialogue in film production.
- Boom technique directly affects intelligibility: The boom operator’s skill — angle, distance, and tracking — is just as important as the microphone itself.
- Record at 24-bit minimum, 48kHz sample rate: These are the baseline technical standards for professional film audio in 2026. Going lower creates dynamic range loss you cannot recover in post.
- Room tone is essential, not optional: Always record at least 60 seconds of room tone at every location so your editor can smooth cuts and fill gaps seamlessly.
- Lavalier microphones serve as backup, not primary: Lavs under clothing are useful for coverage but rarely produce the open, natural sound quality of a well-operated boom mic. Explore our filmmaker bundle courses to learn how to combine both techniques effectively.
- Monitoring in real-time prevents disasters: Always use closed-back headphones and zero-latency monitoring to catch problems during the take, not in the editing room.
Why High Quality Field Audio Makes or Breaks Your Film
Audiences will forgive imperfect visuals far sooner than they will tolerate poor audio. Research consistently shows that viewers abandon films, short films, and video content within the first 30 seconds if the audio is muddy, distorted, or filled with background noise.
For filmmakers at every level, understanding that capturing high quality field audio for film is a craft discipline (not just a technical checkbox) is the first mental shift that separates average productions from compelling ones.
In 2026, streaming platforms have raised the bar significantly. Audiences are audio-literate because of the podcast explosion, and their tolerance for poor production sound has dropped to nearly zero. If you want your film to compete, your field audio must be clean, intelligible, and emotionally present from the moment the camera rolls.
Whether you’re just starting out with foundational filmmaking training or refining your craft at a more advanced level, treating audio as a primary creative element rather than an afterthought will define the quality ceiling of your work.
Location Scouting for Audio: How to Identify the Best Recording Environments
Location scouting for audio is one of the most overlooked pre-production steps in independent filmmaking. Most scouts assess lighting, visual composition, and logistics — but very few spend time listening to a space the way a sound recordist does.
Here’s how to scout locations specifically for audio quality:
- Visit at the same time of day as your scheduled shoot. Traffic patterns, HVAC cycles, nearby businesses, and ambient wildlife all change throughout the day. A quiet location at 9am can be a nightmare at 2pm.
- Listen for low-frequency rumble. Stand still and listen for air conditioning units, refrigerators, traffic, or nearby machinery. These frequencies sit under dialogue and are nearly impossible to remove cleanly in post-production.
- Test the reverb and echo characteristics. Hard surfaces like concrete, tile, and glass cause reflections that make speech sound hollow and distant. Spaces with soft furnishings, carpets, and curtains absorb sound and produce a drier, more natural recording environment.
- Identify electrical interference risks. Fluorescent lighting creates a 60Hz hum that some microphones pick up. Dimmer switches, generators, and older electrical systems all introduce unwanted noise into recordings.
- Note access roads and foot traffic. Even a distant road that appears irrelevant on a map can dominate your recording if sound travels across an open field toward your location.
- Bring a portable recorder and test it. Record 30 seconds of silence and play it back through headphones. You will hear problems your ears miss in the moment.
The best locations for capturing high quality field audio for film are not always the most visually interesting. Sometimes that means advocating loudly during pre-production to modify a location choice or schedule a shoot at an off-peak time to minimize ambient noise.
Microphone Selection for High Quality Field Audio in Film
Microphone selection is where your signal chain either begins with strength or begins with compromise. Every piece of gear downstream (preamps, recorders, post-processing) can only work with what the microphone captures. Choosing the wrong microphone for an environment means you’re fighting a losing battle from the first take.
Shotgun Microphones (The Production Standard)
Shotgun microphones use a supercardioid or hypercardioid polar pattern combined with an interference tube to achieve a narrow pickup angle. This makes them ideal for isolating a single sound source (a speaking actor) from a broader ambient environment.
For most film productions, a mid-range shotgun like the Sennheiser MKH 416 or the Rode NTG3 represents the professional baseline. These microphones feature low self-noise, strong off-axis rejection, and robust build quality for exterior use. Budget-conscious filmmakers often start with the Rode NTG4+, which includes a built-in battery and is well-suited for run-and-gun documentary work.
Small-Diaphragm Cardioid Microphones
In very reverberant spaces, a short shotgun’s interference tube can actually make recordings sound worse by creating comb-filtering artifacts as off-axis reflections enter the mic from odd angles. In these environments, a small-diaphragm cardioid (like the DPA 4017B or Schoeps CMC 6) often produces a more natural, phase-coherent recording despite its wider pickup pattern.
Lavalier Microphones
Lavalier (lapel) microphones are small omnidirectional condenser mics designed for discreet body placement. They are invaluable as backup coverage but come with trade-offs: clothing rustle, body resonance, and the unnatural proximity of a mic to the chest all require careful technique and post-processing to manage.
The DPA 4060 and Sanken COS-11D are the industry benchmarks for lavalier quality, widely used on major film and television productions in 2026. Wireless transmission via systems like the Lectrosonics SMQV or Wisycom MTP41 provides the range and RF reliability needed for complex set environments.
Boom Technique and Microphone Placement on Set
The boom microphone, operated correctly, is the single most important tool for capturing high quality field audio for film. Even the best microphone produces poor results in the hands of an undertrained boom operator.
The Fundamentals of Boom Operation
- Position the mic as close to the sound source as possible without entering the camera frame. The closer the mic, the better the signal-to-noise ratio and the more natural the dialogue sounds.
- Aim toward the mouth, not the top of the head. The microphone’s pickup axis should angle downward toward the actor’s mouth, ideally at a 45-degree angle from above (overhead boom position) or 45 degrees from below (undershot position).
- Match boom movement to actor movement in advance. A skilled boom operator reads the script, knows every line, and anticipates actor movement rather than reacting to it. Reactive booming causes the mic to track a half-second behind, which is audible in the recording.
- Maintain consistent mic-to-mouth distance. When actors move, the boom operator moves with them to preserve the same acoustic relationship. Variations in distance create noticeable level and tone shifts between takes.
- Use a proper pistol grip and shock mount. Handling noise travels through boom poles into the microphone capsule. A quality shock mount (like the Rycote Lyre system) isolates the mic from mechanical vibration transmitted through the pole.
Boom Pole Wind Protection
Exterior shooting requires wind protection on the microphone. A foam windscreen reduces light wind noise, but for anything above a gentle breeze, a blimp-and-deadcat system (a rigid zeppelin housing combined with a furry windjammer cover) is necessary.
Quality systems from Rycote and Cinela are the professional standard for exterior film production. Filming in high-wind environments (beaches, rooftops, open fields) without proper wind protection produces unusable recordings regardless of microphone quality.
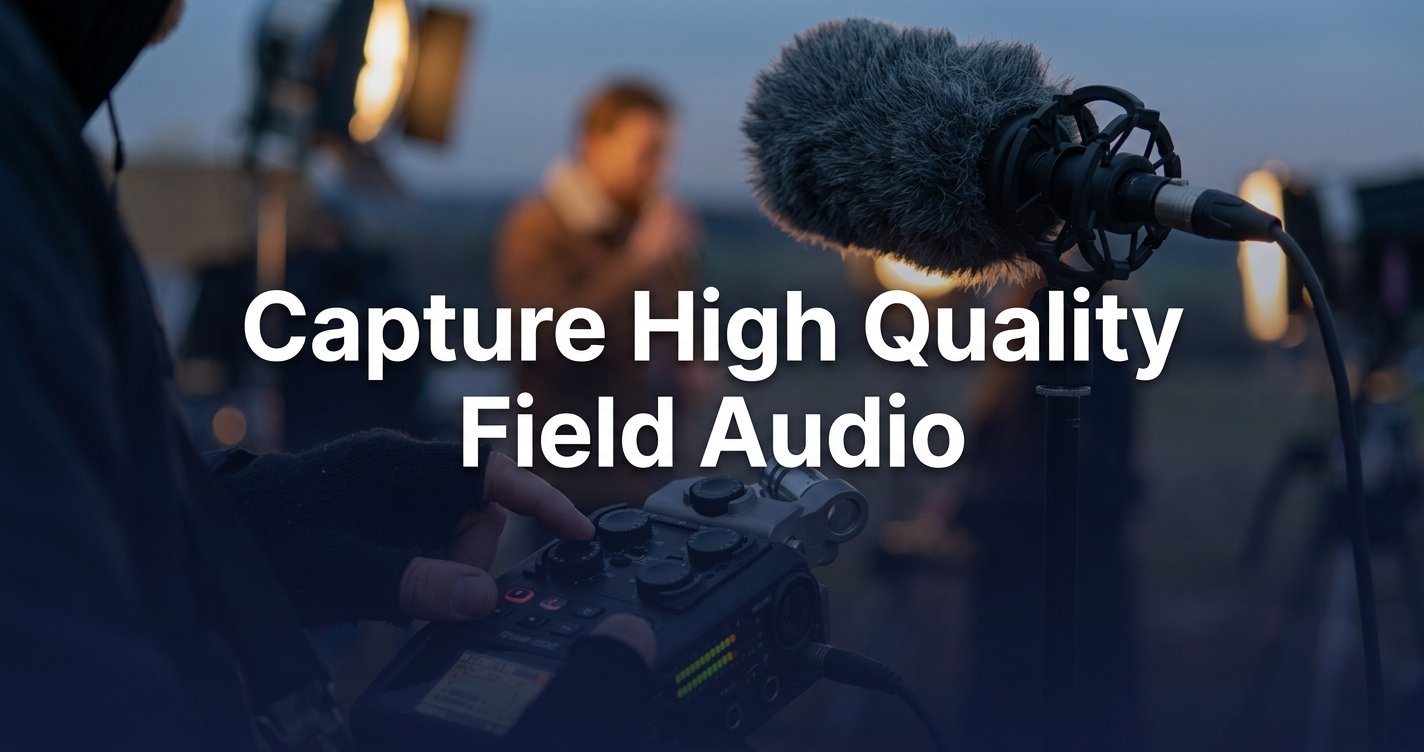
A practical 5-step guide to capturing professional field audio for film, from preparation to on-set techniques.
Recording Pristine Environmental Sound and Room Tone
Environmental sound recording (also called ambience, atmos, or wildtrack recording) is the practice of capturing the acoustic signature of a location separately from dialogue or action. It is one of the most undervalued practices in field audio production.
Why Room Tone Is Non-Negotiable
Every location has a unique acoustic character. When editors cut between takes, the background noise changes subtly (or dramatically) with each cut. Room tone fills those gaps, smoothing edits so the audience doesn’t hear jarring shifts in the ambient sound bed.
The standard practice is to record a minimum of 60 seconds of room tone at each location after the scene wraps, with all cast and crew standing still and silent in their positions. The mixer uses the same microphone setup used for dialogue to ensure the tonal match is as close as possible.
Recording Specific Sound Effects on Location
Beyond room tone, film productions benefit enormously from recording specific sound effects in the actual location rather than relying entirely on sound libraries. Door handles, footsteps on the actual floor surface, and the specific environmental sounds of a place all contribute to a cohesive, believable sonic world.
Carry a separate field recorder (the Sound Devices MixPre-3 II or Zoom F6 are excellent options) specifically for grabbing these “wild sounds” while the primary audio setup handles dialogue. This approach to capturing high quality field audio for film results in a much richer sound design foundation in post-production.
Capturing Clean Dialogue in Challenging Locations
Challenging locations are where field audio expertise separates competent recordists from truly skilled production sound mixers. Every difficult environment has specific mitigation strategies, and knowing them before you arrive on set is essential.
Interiors With Strong HVAC Noise
Negotiate with building management to turn off air conditioning and heating systems during takes. Mark where each switch is located before rolling. Always record with the system off, then restore between takes to keep the crew comfortable.
If the HVAC cannot be shut down, position your boom as close to the actors as the frame allows and use a high-pass filter on your recorder (typically set between 80Hz and 120Hz) to reduce the low-frequency rumble without affecting dialogue clarity.
Exterior Locations with Traffic and Urban Noise
Urban locations require patience and creative scheduling. Identify the rhythmic patterns of the noise (traffic lights, bus routes, nearby construction schedules) and time takes to the quiet windows between noise events.
For unavoidable continuous traffic noise, work closer with the boom and use the directional rejection of your shotgun mic to your advantage. Position actors away from the primary noise source so the front of the mic faces them while the back and sides reject as much traffic noise as possible.
Large Reverberant Spaces
Churches, warehouses, and large interior spaces create reverb that makes dialogue sound distant and washed out. Solutions include physically shortening the distance between mic and actor, using absorption panels (acoustic blankets mounted on C-stands) just out of frame to kill reflections, and switching from a shotgun to a short cardioid microphone for a more natural response in highly reflective rooms.
If you’re building your skills in production sound as part of a broader filmmaking education, our advanced filmmaking training covers these real-world problem-solving techniques in structured depth.
Monitoring, Gain Staging, and Field Recorder Settings
Even the best microphone and boom technique produces poor results without proper gain staging and real-time monitoring. This is the technical discipline that prevents both distortion and noise floor problems in your recordings.
Setting Proper Record Levels
For dialogue, target a nominal recording level of -18 dBFS with peaks not exceeding -6 dBFS. This “headroom” approach ensures that unexpected loud moments (a sudden shout, a door slam) don’t clip the recording. Clipping in digital audio is a hard, unpleasant distortion that cannot be repaired in post-production.
Most professional field recorders (Sound Devices 688, Zoom F8n Pro, Tascam Portacapture X8) allow you to set dual-recording — capturing the same channel at two different gain levels simultaneously as a safety net against unexpected peaks.
Sample Rate and Bit Depth Settings
For all film production work in 2026, record at a minimum of 48kHz sample rate and 24-bit depth. These are the delivery standards for all major post-production workflows. Recording at 96kHz is worth considering for material that will undergo significant pitch-shifting or time-stretching in sound design, as the higher sample rate provides more data for those processes to work with cleanly.
Real-Time Monitoring Discipline
Always monitor your recordings in real-time through closed-back headphones during takes. Open-back headphones bleed sound into the monitoring environment and make it hard to distinguish what’s on the recording from what you’re hearing in the room. Professional field mixers use headphones like the Sony MDR-7506 or Beyerdynamic DT 770 Pro specifically for their closed design and accurate frequency response.
Listening critically through headphones during every take is the only reliable way to catch problems (clothing rustle on a lavalier, a distant siren approaching, a boom shadow entering frame that causes the operator to pull back too far) before they become problems that halt post-production.
Common Field Audio Mistakes and How to Fix Them
Understanding what goes wrong on set is just as important as knowing what to do right. Here are the most frequent field audio problems and their practical solutions:
- Boom too far from the actor: The most common mistake on low-budget sets. The fix is communicating with the camera operator before each shot to find the absolute closest position the boom can be without entering frame.
- No room tone recorded: Many productions skip room tone to save time and regret it deeply during editing. Make room tone recording a mandatory wrap step at every location, not an optional one.
- Overloaded gain causing distortion: Set levels conservatively and use dual-record functionality on your recorder as a safety backup for every scene.
- Wireless RF interference: Test all wireless frequencies at each location before shooting. In 2026, RF-congested urban environments require a proper frequency coordination strategy, not a “plug in and hope” approach.
- Ignoring location noise until the shoot day: The single most preventable field audio problem is one that pre-production audio scouting eliminates entirely. Scout your locations for sound.
- Relying on post-production to fix on-set problems: Dialogue replacement (ADR) is expensive, time-consuming, and rarely matches the performance quality of a well-recorded original take. Capture it right in the field.
Filmmakers who want to go deeper on production audio as part of a complete craft education can explore the Becoming an Auteur Level 3 program, which addresses the full spectrum of directorial and technical decision-making on a professional production.
Conclusion
This ultimate guide to capturing high quality field audio for film covers the core disciplines that separate professional-sounding productions from amateur ones: thoughtful location scouting for audio, intelligent microphone selection, disciplined boom technique, careful environmental sound recording, and rigorous real-time monitoring.
None of these skills are optional. Each one builds on the others to create a field audio workflow that gives your editor, sound designer, and mixer clean, usable material to work with. Capturing high quality field audio for film is not about having the most expensive gear — it’s about making smart decisions at every stage of production, from the scout visit to the final take of the day.
If you want to build these skills in a structured, mentored environment alongside every other dimension of filmmaking craft, explore our advanced filmmaking curriculum to see how production sound fits within a complete professional education. Great audio starts in the field, and the decisions you make before you roll camera determine everything that follows.
Frequently Asked Questions
What is the best microphone for capturing high quality field audio for film?
The Sennheiser MKH 416 and Rode NTG3 are the most widely used shotgun microphones for professional film production in 2026. For budget-conscious filmmakers, the Rode NTG4+ provides excellent performance at a significantly lower price point while still meeting professional quality standards for field audio capture.
How do you record clean dialogue in a noisy outdoor location?
The most effective strategy is positioning the boom as close to the actor as the camera frame allows and using the directional rejection of a shotgun microphone to minimize off-axis noise. Scheduling takes during natural quiet periods in the environment (between traffic surges, after nearby construction stops) is equally important and costs nothing.
What sample rate and bit depth should I use for film audio recording?
Record at 48kHz and 24-bit depth as your professional minimum for all film work — these are the delivery standards for post-production workflows across all major platforms in 2026. If your material will undergo heavy pitch-shifting or time-stretching in sound design, recording at 96kHz provides additional data that prevents digital artifacts during processing.
Is boom mic always better than a lavalier for film dialogue?
A correctly operated boom microphone almost always produces more natural, open-sounding dialogue than a lavalier attached under clothing. Lavaliers are valuable as backup coverage and in situations where boom operation is physically impossible, but they should not be the primary dialogue source when a boom mic and skilled operator are available.
How important is location scouting for audio on a film production?
Location scouting for audio is one of the highest-return pre-production investments you can make because problems identified before the shoot day can be mitigated or avoided entirely. Discovering an HVAC noise problem or nearby traffic issue on the day of the shoot forces rushed, often ineffective solutions that compromise your recording quality.
What is room tone and why do you need it for film audio?
Room tone is a 60-second (or longer) recording of a location’s ambient sound made with the full crew in position and completely silent, using the same microphone setup used for dialogue. Editors use it to fill gaps between cuts and smooth out discontinuities in the background sound, making location changes and edit points aurally invisible to the audience.
Can AI tools fix bad field audio in post-production?
AI audio restoration tools (like iZotope RX 11 and Adobe Enhance Speech) have become impressively capable in 2026, but they work best when they have something good to start with and tend to introduce an unnatural, over-processed quality when used on severely degraded recordings. Capturing clean field audio from the outset is always faster, cheaper, and sounds better than relying on AI restoration as a fallback.