If you want to apply the top professional tips for mastering advanced mise-en-scene layouts, you need to understand something that most filmmakers overlook: average fixation duration during scene viewing is approximately 280 milliseconds, meaning every compositional decision you make in a frame must work within a fraction of a second to direct where the audience looks. This makes intentional blocking, deliberate set piece placement, and precise visual choreography not just stylistic choices, but functional storytelling tools.
Table of Contents
Key Takeaways
- Blocking is storytelling: Where you place actors in the frame communicates power, relationship, and emotional state without a single line of dialogue.
- Set pieces are not decoration: Every prop, piece of furniture, and architectural element should serve a compositional or narrative function in your layout.
- The audience’s eye follows lines: Diagonal edges, character sight-lines, and floor geometry funnel gaze toward story-critical points in the frame.
- Depth layers add dimension: Foreground, midground, and background elements placed with intention create a sense of three-dimensional space on a two-dimensional screen.
- Screen geography must stay consistent: Maintaining spatial logic across cuts prevents audience disorientation, especially in complex multi-character scenes.
- Lighting reinforces blocking: Where you place your light sources directly shapes which parts of the frame demand attention, making lighting inseparable from composition.
- Structured learning accelerates mastery: Courses like The Advanced Filmmaking Level 2 at Cinemastery provide systematic frameworks for applying these principles in real productions.
Understanding the Foundations of Advanced Mise-en-Scene Layouts
Mise-en-scene is the total visual language of a shot: everything the camera sees, and how it is arranged. At an advanced level, this goes well beyond basic framing rules.
Advanced mise-en-scene layout means making every element in the frame, from the position of an actor’s body to the angle of a table leg, serve the story. Nothing in a well-directed shot is accidental.
To master this, you need to internalize three core principles:
- Visual hierarchy: Some elements in the frame must demand attention first. You control this through position, size, contrast, and movement.
- Spatial relationships: The distance and angle between characters and objects communicates meaning. A character framed small against a large set feels overwhelmed. A character centered and close to the lens feels dominant.
- Temporal flow: Advanced layouts account for how the eye moves through the frame over time, not just what it sees at first glance.
If you are building these skills from the ground up, starting with structured foundational training matters. The Basics Level 1 course at Cinemastery gives you the visual language framework you need before tackling complex blocking and compositional systems.
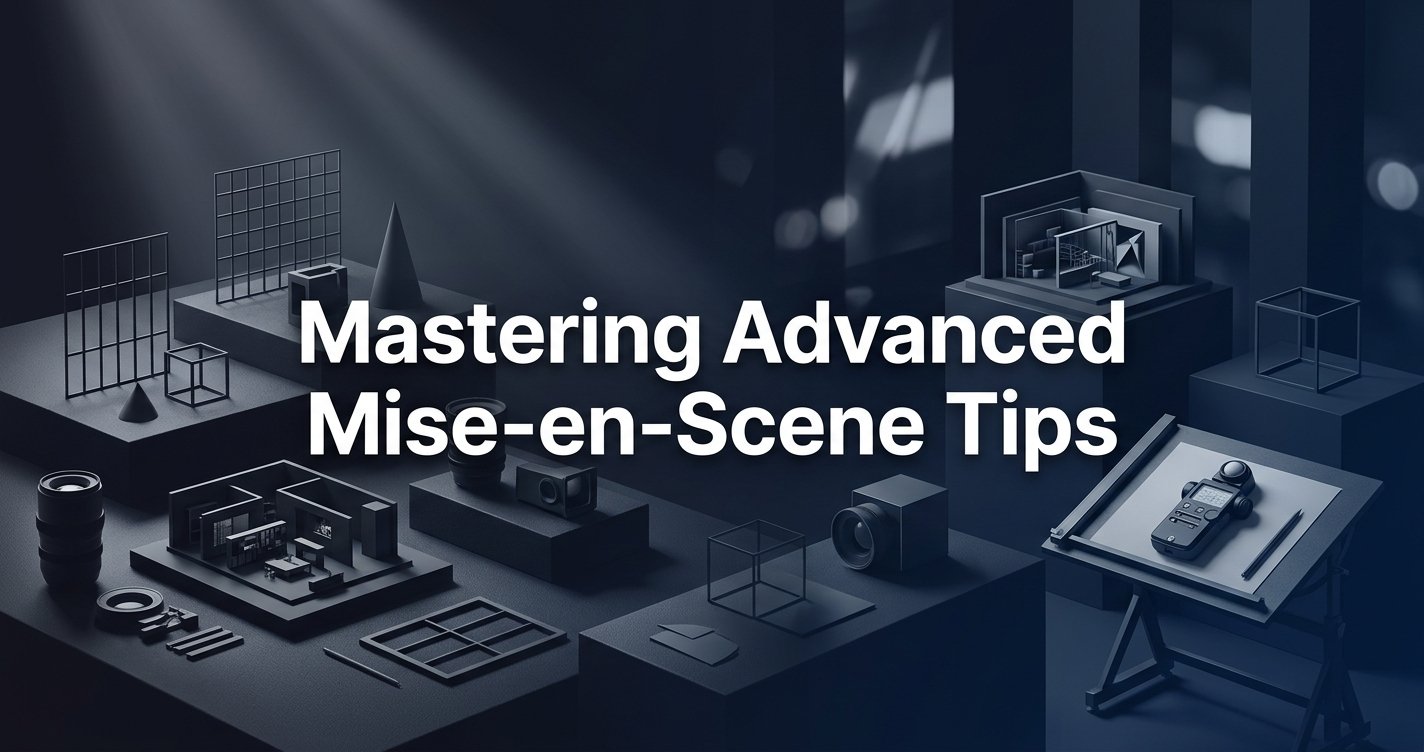
A concise visual guide highlighting the five essential principles of advanced mise-en-scene layouts to elevate cinematic composition.
Advanced Actor Blocking Techniques to Guide the Audience’s Eye
Blocking is the most direct tool a director has for controlling audience attention. When you place an actor upstage versus downstage, standing versus seated, or angled toward versus away from camera, you are making an argument about who matters in this moment.
Here are the most effective advanced blocking techniques used by professional directors:
Triangular Blocking
Place three actors (or a combination of actors and set pieces) in a triangular formation. The apex of the triangle naturally draws the eye.
Rotate the triangle across a scene to shift visual dominance without camera movement. This is especially effective in dialogue-heavy scenes where cutting would interrupt rhythm.
Blocking Against Negative Space
Position an actor so that a large area of empty space surrounds them on one specific side. The eye reads negative space as direction of travel, emotional isolation, or unresolved tension.
This technique works particularly well when you want an audience to feel a character’s vulnerability without having them say anything.
Z-Axis Blocking
Move actors toward or away from camera along the z-axis (depth), not just left and right across the frame. This creates a sense of urgency and three-dimensionality that flat lateral blocking cannot achieve.
A character walking directly toward the lens becomes increasingly dominant. A character walking away cedes power to whoever remains facing camera.
Asymmetric Pairing
When blocking two characters, avoid placing them at equal distances from camera at equal heights. Intentional asymmetry (one standing, one seated; one foreground, one midground) communicates dynamic power shifts without dialogue.
“The best-blocked scenes feel completely natural to the audience. The craft is invisible precisely because it is working perfectly.” — A core principle taught across professional directing programs.
Using Set Pieces and Props as Compositional Tools
Set pieces are not background decoration. In advanced mise-en-scene layouts, every object in the frame either reinforces the story or dilutes it. Professional directors treat set dressing as an extension of blocking.
Here is how to use set pieces strategically:
Framing Within the Frame
Use doorways, windows, archways, and furniture arrangements to create secondary frames inside your shot. An actor seen through a doorframe is psychologically separated from the space around them.
This technique signals containment, observation, or transition without any camera movement or dialogue.
Foreground Obstruction
Placing an object (a plant, a glass, a piece of furniture) in the near foreground creates depth and adds a voyeuristic quality. The audience feels like they are witnessing something rather than being shown it.
Use this technique sparingly, as overuse reads as a stylistic tic rather than a purposeful choice.
Directional Set Pieces
Objects with strong directional qualities (a long table, a staircase, a row of chairs) create implied lines that funnel gaze toward or away from your focal point.
A table running diagonally from foreground to background can guide the eye to a character placed at its far end without a single line of blocking instruction.
Symbolic Placement
At an advanced level, props placed near specific characters carry meaning. A weapon on a table between two characters creates a different tension than the same weapon in a drawer behind one of them.
The position of objects relative to actors is part of the story, and the audience reads it subconsciously even when they cannot articulate why a scene feels tense.
Top Professional Tips for Creating Depth and Layered Compositions
One of the most consistent differences between amateur and professional mise-en-scene layouts is the use of depth. Flat compositions (actor against a plain background, nothing in the foreground) feel static and televisual. Layered compositions feel cinematic.
Use these professional approaches to build depth into every shot:
- Three-zone composition: Actively populate foreground, midground, and background. Each zone should have at least one visual element, even if the background is out of focus.
- Rack focus as a blocking tool: Plan actor positions so that a focus pull can shift narrative attention from one character to another within a single unbroken shot. This is blocking and cinematography working together.
- Overlapping planes: Position actors so that one partially overlaps another or overlaps a set piece. Overlapping creates a sense of three-dimensional space that full separation cannot achieve.
- Size contrast for power: A character who appears larger in frame because they are closer to the lens reads as more powerful, even when standing still. Use this deliberately rather than by default.
These depth techniques are central to the curriculum in the Advanced Filmmaking Level 2 catalog, which covers complex scene planning with layered visual compositions.
Leading Lines and Eyeline Vectors in Professional Directing Workflows
Leading lines are one of the most powerful and underused tools in advanced mise-en-scene layouts. A leading line is any visual element that creates a direction of travel for the eye.
In filmmaking, leading lines come from multiple sources:
- Architecture: Walls, hallways, staircases, and floor patterns all create lines that the eye naturally follows.
- Furniture diagonals: A table or counter running at an angle creates an implied vector that leads toward or away from your subject.
- Character sight-lines: Where an actor looks is one of the strongest leading lines available. The audience will follow a character’s gaze almost reflexively.
- Light shafts and shadow edges: The boundary between lit and unlit areas creates a line. The eye tracks toward light, making shadow edges powerful directional tools.
Research on leading-line composition confirms that skilled photographers and directors can guide gaze flow using compositional line placement, meaning this is not an abstract concept but a measurable, practical technique you can deploy frame by frame.
In professional directing workflows, leading lines are planned during the shot list stage, not discovered during the shoot. Sketch the dominant lines of your set before placing actors. Then block the actors to intersect with, reinforce, or intentionally cut against those lines.
Top Professional Tips for Managing Screen Geography and Continuity
Advanced mise-en-scene layouts require a consistent internal logic across cuts. Screen geography is the spatial map the audience builds in their mind while watching a scene. If that map contradicts itself, disorientation follows.
Here are the professional rules for managing screen geography:
Establish Before You Fragment
Always open a scene with a wide establishing shot that shows the full spatial relationship of all characters and major set pieces. Once the audience has this map, you can cut to close-ups without them losing their spatial orientation.
Skipping the establishing shot is a common shortcut that costs audience engagement in the long run.
Maintain Consistent Eyeline Directions
If Character A is looking screen right at Character B in one shot, Character B must be looking screen left in the reverse. Eyeline mismatches break the spatial logic immediately and read as unprofessional.
This also applies across multiple shots in a scene. Once you establish a character’s screen direction, any deviation must be motivated by movement or a new spatial relationship.
Use the 180-Degree Rule Purposefully
The 180-degree rule is not just a rule to avoid breaking. It is a tool. Staying on one side of the axis creates stability. Crossing the axis creates disorientation. If your story calls for disorientation (a character’s world turning upside down, a spatial threat approaching), a motivated axis cross reinforces that emotionally.
Research on match-action continuity supports this: there is a window of acceptable spatial mismatch, especially when action speed supports the transition. Use this window to push your stylistic choices without breaking audience comprehension.
Anchor Characters to Specific Screen Positions
In complex multi-character scenes, assign each character a screen position (left, center, right) and maintain it across all shots. When a character’s position shifts, it signals a power change or spatial transition.
This technique is used extensively in high-stakes negotiation scenes and ensemble sequences, where spatial consistency carries as much weight as performance.
Lighting as a Blocking Tool in Advanced Mise-en-Scene Layouts
Lighting and blocking are two sides of the same decision. In advanced mise-en-scene practice, you do not light a set and then block into it. You treat lighting positions as choreographic constraints and creative opportunities simultaneously.
Here is how professional directors integrate lighting into their layout thinking:
Light Placement Defines Actor Paths
If you place a key light in a specific position, actors who move into that light will naturally attract the most attention. This means you can guide characters into and out of prominence simply by placing lights correctly, without relying entirely on camera movement or editing.
Plan your light plot in parallel with your blocking plan, not after it.
Use Shadow as Compositional Architecture
Hard light creates strong shadows. Those shadow edges are compositional lines. A cast shadow from a window frame across a floor creates leading lines that the camera can follow or that block actors can interact with.
Think of shadows as free set dressing that you can modify entirely through light placement.
Motivated Light Sources
In advanced mise-en-scene, every light in a shot should appear to come from a source that exists in the story world: a window, a lamp, a screen, a fire. When your practical light sources align with your dramatic blocking positions, the composition reads as organic and coherent.
Contrast as Hierarchy
The brightest and highest-contrast area of a frame draws the eye first. If your most important character or object is not the brightest element in the frame, you are working against your own story.
Review every composition and ask: is the highest-contrast area where I want the audience to look first?
Professional Directing Workflows for Scene Planning
The top professional tips for mastering advanced mise-en-scene layouts are only as useful as the workflow in which you apply them. Professionals plan mise-en-scene systematically, not intuitively on the day of the shoot.
Here is a workflow used by professional directors:
Step 1: Story Breakdown
Before any visual planning, break the scene into its emotional and narrative beats. Identify the single most important moment in the scene. Your mise-en-scene layout should build toward, frame, and resolve around that moment.
Step 2: Location or Set Mapping
Create a top-down floor plan of your set or location. Mark all fixed architectural elements: walls, windows, doors, stairs, furniture. These are your compositional constraints and opportunities.
Step 3: Blocking Sketches
On your floor plan, sketch actor positions for each beat. Draw the dominant lines of each position (sight-lines, body angles, implied movement paths). Check that leading lines support, rather than fight, your story direction.
Step 4: Shot List Integration
Build your shot list from your blocking plan, not independently of it. Each shot should capture specific blocking positions and layer relationships that you have already planned. This ensures that your coverage supports your mise-en-scene intentions.
Step 5: Rehearsal and Adjustment
Walk through the blocking with actors before the camera is set. Watch the movement at eye level. Check that each position feels natural for the performers and reads correctly from your planned camera angles.
This five-step process is central to what the Becoming an Auteur Level 3 catalog teaches: developing a personal, repeatable workflow for advanced visual storytelling.
Top Professional Tips for Mastering Advanced Mise-en-Scene Through Structured Practice
Reading about advanced mise-en-scene layouts is only the beginning. The gap between knowing these techniques and executing them under production conditions is closed through structured, deliberate practice.
Here are the most effective practice methods used by working directors:
- Re-block existing scenes: Choose a scene from a film you admire. Watch it with the sound off. Sketch the blocking on a floor plan. Then re-block it differently and analyze what changes emotionally.
- Single-location exercises: Choose one room and shoot five different scenes in it using only blocking and set piece placement to change the visual and emotional tone. No relighting, no lens changes.
- Shot analysis journals: Keep a journal where you analyze one shot per day from a film. Note blocking positions, leading lines, depth layers, and screen geography. Over time, this builds an internalized visual vocabulary.
- Collaborate with actors on blocking: Work with actors who will push back on blocking that feels unnatural. Their resistance reveals where your composition is forcing behavior rather than supporting it.
- Progressive complexity: Start with two-character scenes, then add a third character, then add movement. Increasing complexity systematically builds your ability to manage multiple compositional variables simultaneously.
For filmmakers ready to develop an authorial visual voice, Becoming an Auteur Level 3 at Cinemastery focuses specifically on developing a distinct personal style through advanced mise-en-scene mastery, including the Show, Don’t Tell philosophy at the compositional level.
If you want comprehensive training across all levels, the Filmmaker Bundle combines multiple course levels into a single structured learning path, taking you from foundational skills through to auteur-level composition.
You can also browse the full Cinemastery course catalog to find the specific training modules that match your current skill level and production goals.
Conclusion
The top professional tips for mastering advanced mise-en-scene layouts come down to one consistent principle: every element in the frame is a deliberate choice, and every deliberate choice communicates something to the audience. Blocking positions, set piece placement, leading lines, depth layers, screen geography, and lighting all work together as a unified compositional system.
Applying these techniques requires both knowledge and structured practice. The workflows covered here, from triangular blocking and z-axis movement to foreground obstruction and shadow architecture, give you a concrete toolkit for planning and executing advanced mise-en-scene layouts on any production.
Whether you are working on a short film, a feature, or a commercial project, these top professional tips for mastering advanced mise-en-scene will change how you approach every frame you compose. Start with systematic scene planning, build your visual vocabulary through daily analysis, and seek structured learning to accelerate your growth as a director.
Explore the full range of filmmaking education available at Cinemastery to find the right level of training for where you are in your directing journey.
Frequently Asked Questions
What is advanced mise-en-scene and how is it different from basic composition?
Advanced mise-en-scene goes beyond basic framing rules to treat every element in the frame (actor positions, set pieces, lighting, depth layers, and eyeline vectors) as part of a coordinated storytelling system. While basic composition asks where to put the camera, advanced mise-en-scene asks how every visual element in the frame communicates meaning simultaneously. Mastering advanced mise-en-scene layouts means making these decisions deliberately and systematically, not intuitively.
How do professional directors use blocking to guide the audience’s eye?
Professional directors use blocking techniques like triangular formations, z-axis movement, asymmetric pairing, and negative space positioning to control where the audience looks at every moment in a scene. These top professional tips for mastering advanced mise-en-scene layouts treat actor positions as compositional tools rather than just performance logistics. The goal is to make visual hierarchy feel completely natural while being fully controlled.
What are the best set piece placement tips for advanced mise-en-scene?
The most effective set piece placement strategies in advanced mise-en-scene layouts include creating secondary frames within the shot using doorways and windows, placing directional objects (tables, stairs, corridors) to create leading lines, and using foreground obstructions to add depth and a voyeuristic quality. Every prop and piece of furniture should either reinforce the story’s emotional intent or be removed from the frame entirely.
How do leading lines work in film blocking and directing?
Leading lines in film blocking are any visual elements (architectural edges, furniture diagonals, character sight-lines, shadow boundaries) that create a direction of travel for the viewer’s eye. Eye-tracking research confirms that skilled use of leading-line composition measurably guides gaze flow toward story-critical areas of the frame. In professional directing workflows, leading lines are planned during the shot list stage by analyzing the dominant geometry of the location or set before placing actors.
Is mastering advanced mise-en-scene layouts worth learning in 2026?
In 2026, with audiences consuming more visual content across more platforms than ever, the ability to create compelling, intentional mise-en-scene layouts is one of the clearest differentiators between amateur and professional filmmaking. Top professional tips for mastering advanced mise-en-scene layouts remain highly relevant because visual storytelling demands have increased, not decreased, as production quality benchmarks rise across streaming and independent film. Structured courses like those at Cinemastery provide the fastest path to building these skills systematically.
How long does it take to master advanced blocking and mise-en-scene techniques?
Most directors begin seeing measurable improvement in their blocking and mise-en-scene decisions after three to six months of deliberate, structured practice combined with regular shot analysis. Full mastery of advanced mise-en-scene layouts, where compositional decisions become instinctive and consistent across production conditions, typically develops over several years of active directing work. Accelerated learning through structured programs like Advanced Filmmaking Level 2 significantly shortens this timeline.
What is the best way to start learning advanced mise-en-scene if I am a beginner?
Beginners should start by building a solid foundational visual language before tackling advanced mise-en-scene layouts, as the advanced techniques build directly on core skills in shot composition, camera operation, and basic blocking. A structured progression from foundational courses through to advanced directing techniques provides the most efficient learning path. Daily shot analysis practice, combined with formal instruction, accelerates the internalization of the principles covered in the top professional tips for mastering advanced mise-en-scene layouts.