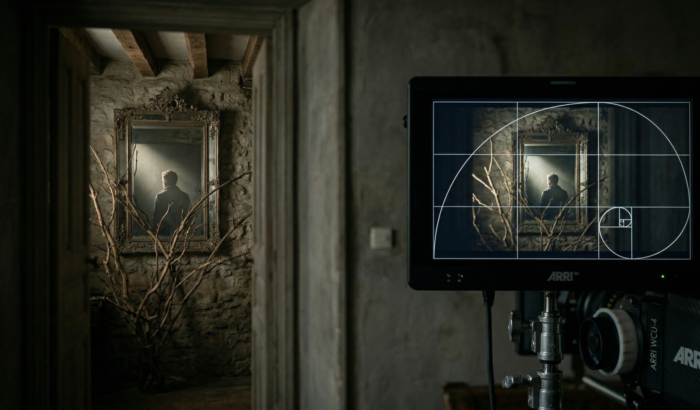
A great film is not simply “shot”; it is choreographed. For the uninitiated, camera movement is often seen as a way to “get the whole scene in the frame.” For the master cinematographer, however, movement is a visceral language—a sacred workflow that dictates how an audience feels, breathes, and reacts to the unfolding narrative.
Many aspiring filmmakers fall into the trap of “movement for movement’s sake.” They buy the latest gimbal, slap a camera on it, and run around the set, hoping the kinetic energy will mask a lack of storytelling depth. This is a myth that needs to be shattered. True cinematic mastery comes from understanding the psychological weight of every inch the lens travels.
In this comprehensive guide, we are going to unlock the secrets of the “Four Pillars” of camera movement—Pan, Tilt, Dolly, and Boom—and explore the advanced layering techniques that separate amateur footage from Hollywood-caliber visuals.
Key Takeaways
- Movement is Psychology: Every camera move should be “motivated” by the story or character’s internal state.
- Physical vs. Optical: Understanding why a Dolly (physical) provides more depth than a Zoom (optical) via the parallax effect.
- The Power of Rigging: How professional tools like fluid heads, jib arms, and sliders dictate the texture of your shot.
- Layered Movement: The secret to high-end cinematography lies in combining multiple axes of movement simultaneously.
Table of Contents
- The Four Pillars: Understanding the Essentials
- Advanced Translational Movements: Truck, Track, and Orbit
- Optical vs. Physical Movement: The Parallax Secret
- Motivated vs. Unmotivated Movement
- The Tools of the Trade: Hardware Guide
- Expert Insider Tips: On-Set Secrets
- The Layering Technique: Creating Complex Shots
- Post-Production: Enhancing the Kinetic Experience
- Conclusion: Movement is Emotion
- Frequently Asked Questions
I. The Four Pillars: Understanding the Essentials
To master the language of the lens, you must first master the primary axes of movement. These are the building blocks upon which all cinematic sequences are constructed.
1. The Pan (Horizontal Rotation)
The Pan (short for panorama) occurs when the camera rotates horizontally on a fixed vertical axis. Imagine the camera is a human head turning from left to right while the neck remains in place.
- The Technicality: You are rotating on the Y-axis.
- The Psychology: Panning mimics the natural human instinct to survey a room or follow a moving subject. A slow pan can build suspense by delaying a “reveal,” while a fast Whip Pan (as seen frequently in the films of Wes Anderson) can create a comedic beat or an energetic transition between two locations.
- Cinemastery Insight: Always “lead” your subject. If a character is walking from left to right, keep them in the trailing third of the frame to give them “looking room” or “lead room.”
2. The Tilt (Vertical Rotation)
The Tilt is the vertical equivalent of the pan. The camera stays in one physical spot but pivots up or down.
- The Technicality: You are rotating on the X-axis.
- The Psychology: Tilting is often used to establish power dynamics or scale. A Tilt Up from a character’s boots to their face creates a sense of awe, making the character look monumental or intimidating. Conversely, a Tilt Down can emphasize a character’s vulnerability or draw the audience’s attention to a significant object on the ground.
- Expert Use Case: Use a tilt to bridge the gap between two subjects at different heights—for instance, a sniper on a roof and a target on the street—without needing to cut.
3. The Dolly (The Physical Push/Pull)
The Dolly is perhaps the most transformative movement in cinema. Unlike a zoom, where the lens’s focal length changes, a dolly involves physically moving the entire camera rig toward or away from the subject.
- The Technicality: Movement along the Z-axis.
- The “Dolly In”: This move is used to emphasize a moment of realization. As the camera physically moves closer to a character’s face, the background begins to shift in relation to the foreground (the parallax effect), pulling the audience deeper into the character’s internal world.
- The “Dolly Out”: Often used to signify isolation or to reveal the vast, perhaps overwhelming environment surrounding a character.
4. The Boom / Pedestal (Vertical Travel)
The Boom shot (often executed with a jib or crane) involves moving the entire camera body up or down through space.
- The Difference: While a Tilt pivots the lens, a Boom physically lifts the camera.
- The Storytelling Impact: Starting low on a small detail (like a discarded letter) and “booming up” to reveal a massive landscape is a classic cinematic trope used to provide context and scale. It signals to the audience that the story is expanding.
II. Beyond the Basics: Advanced Translational Movements
Once you have mastered the stationary rotations and the linear push, you must learn to move the camera laterally and orbitally to create truly immersive environments.
5. The Truck (Lateral Movement)
A Truck is similar to a Dolly, but instead of moving forward or backward, the camera moves left or right parallel to the action.
- The Feeling: It gives the audience the sensation of “walking with” the characters. It feels more observational and objective than a Dolly In.
6. The Tracking / Follow Shot
While “Tracking Shot” is often used as a catch-all term, in professional cinematography, it specifically refers to a shot that follows a subject’s movement.
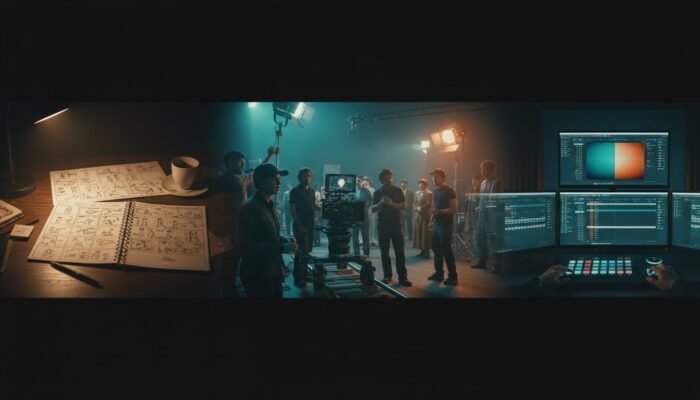
- The “Oner”: Many directors, like Alejandro González Iñárritu in Birdman, use extended tracking shots to create a “real-time” visceral experience. Tracking shots require immense coordination between the DP (Director of Photography), the actors, and the grip department.
7. The Arc & Orbit Shot
The Arc Shot involves moving the camera in a perimeter circle around the subject.
- The Result: It creates a sense of dizzying importance or disorientation. In action cinema (think Michael Bay), the 360-degree orbit is used to make a character appear “heroic” as the background whirls behind them.
8. The Roll (The Dutch Tilt in Motion)
A Roll is a rotation on the Z-axis (turning the camera on its side). While a static “Dutch Angle” suggests unease, a dynamic Roll is often used in flight sequences or high-octane action to mimic the banking of an aircraft or the tumbling of a character.
III. Optical vs. Physical Movement: The Parallax Secret
One of the most common questions from student filmmakers is: “Why can’t I just zoom in instead of moving the tripod?”
The answer lies in Parallax. When you move the camera physically (Dolly), the spatial relationship between foreground and background objects changes. This mimics how our eyes perceive the 3D world.
When you Zoom, you are simply magnifying the image. The background doesn’t move relative to the subject; it just gets larger and flatter. This “background compression” can be a stylistic choice, but it lacks the immersive, “walking into the frame” feel of a physical Dolly.
The Dolly Zoom (The “Vertigo” Effect)
This legendary move, pioneered by Irmin Roberts for Alfred Hitchcock’s Vertigo, involves dollying the camera in one direction while simultaneously zooming the lens in the opposite direction.
- The Effect: The subject remains the same size in the frame, but the world around them appears to warp and stretch. It is the ultimate visual representation of a panic attack or a life-altering realization.
IV. Motivated vs. Unmotivated Movement
In the “Sacred Workflow” of cinematography, every move must have a reason.
- Motivated Movement: The camera moves because the subject moves. A character walks across the room; the camera pans to follow. This is invisible storytelling—the audience doesn’t “notice” the camera because it is simply keeping up with the narrative action.
- Unmotivated Movement: The camera moves independently of the characters. This is the “Omniscient” camera. It might creep toward a closed door or pull away from a character who is standing perfectly still. This is used to create mood, reveal information the character doesn’t know, or establish the “hand of the director.”
V. The Tools of the Trade: Hardware Guide
To achieve these moves with professional precision, you need the right “rigging.”
- Fluid Head Tripods: Essential for smooth Pans and Tilts. Brands like Sachtler or Manfrotto use hydraulic fluid to provide resistance, preventing jerky “starts” and “stops.”
- Sliders & Dollies: For short, controlled linear movements. A slider is great for table-top work, while a full doorway dolly on tracks is needed for long actor walk-and-talks.
- Gimbals & Steadicams: These stabilize the camera during handheld movement. Steadicams (using physical counterweights) provide a “floating,” organic feel, while electronic Gimbals (like the DJI Ronin) offer precision and ease of use.
- Jibs & Cranes: These allow for the “Boom” shots. They can range from small carbon-fiber arms to massive Technocranes that can extend 50 feet into the air.
VI. Expert Insider Tips: On-Set Secrets
Ready to shatter the mediocrity of standard footage? Use these pro-level tricks:
Tip #1: The Rubber Band Trick
If you are using a cheaper tripod and struggling with smooth pans, hook a thick rubber band to the pan handle. Instead of pulling the handle with your hand, pull the rubber band. The elasticity absorbs the micro-tremors of your muscles, resulting in a buttery-smooth move.
Tip #2: The “Lead the Eye” Rule
A camera move should never end in “dead space.” Always end your move on a point of interest. If you are panning across a room, the move should conclude exactly when a character enters the frame or when a key prop becomes visible.
Tip #3: Blocking for Depth
Movement looks 10x more expensive when there is Foreground. If you are dollying, try to “skim” past a plant, a pillar, or a wall in the foreground. This highlights the parallax effect and makes the movement feel massive.
Tip #4: The Focus Puller’s Dance
During a Dolly-In, your distance to the subject changes constantly. To keep the eyes sharp, you need a follow-focus system. Professional DPs work in tandem with a 1st AC (Assistant Cameraman) who “pulls focus” based on measured marks on the floor.
VII. The Layering Technique: Creating Complex Shots
The hallmark of a Hollywood DP is the ability to move the camera on multiple axes at once. This is what we call Layered Movement.
How to Execute a “Triple Axis” Reveal
- The Base (Dolly): Start moving the camera forward toward a doorway.
- The Layer (Boom): As you move forward, slowly raise the jib arm (Boom Up).
- The Polish (Tilt): As the camera rises, tilt the lens down to keep the subject centered.
Why this works: The Dolly provides depth, the Boom provides scale, and the Tilt provides focus. Together, they create a sweeping, “God-like” perspective that a single-axis move can never achieve.
VIII. Post-Production: Enhancing the Kinetic Experience
Sometimes, the movement isn’t quite right in the raw footage.
- Warp Stabilizer: Tools in Adobe Premiere or DaVinci Resolve can smooth out micro-jitters, but beware: over-using them creates a “jello” effect.
- Digital Movement: If you shot on a high-resolution sensor (like 6K or 8K), you can “fake” a slow zoom or pan in post by keyframing the position and scale.
- The Role of Sound: Never underestimate SFX. A low-frequency “whoosh” or a subtle rumble timed with a camera move “sells” the weight of the camera to the audience’s subconscious.
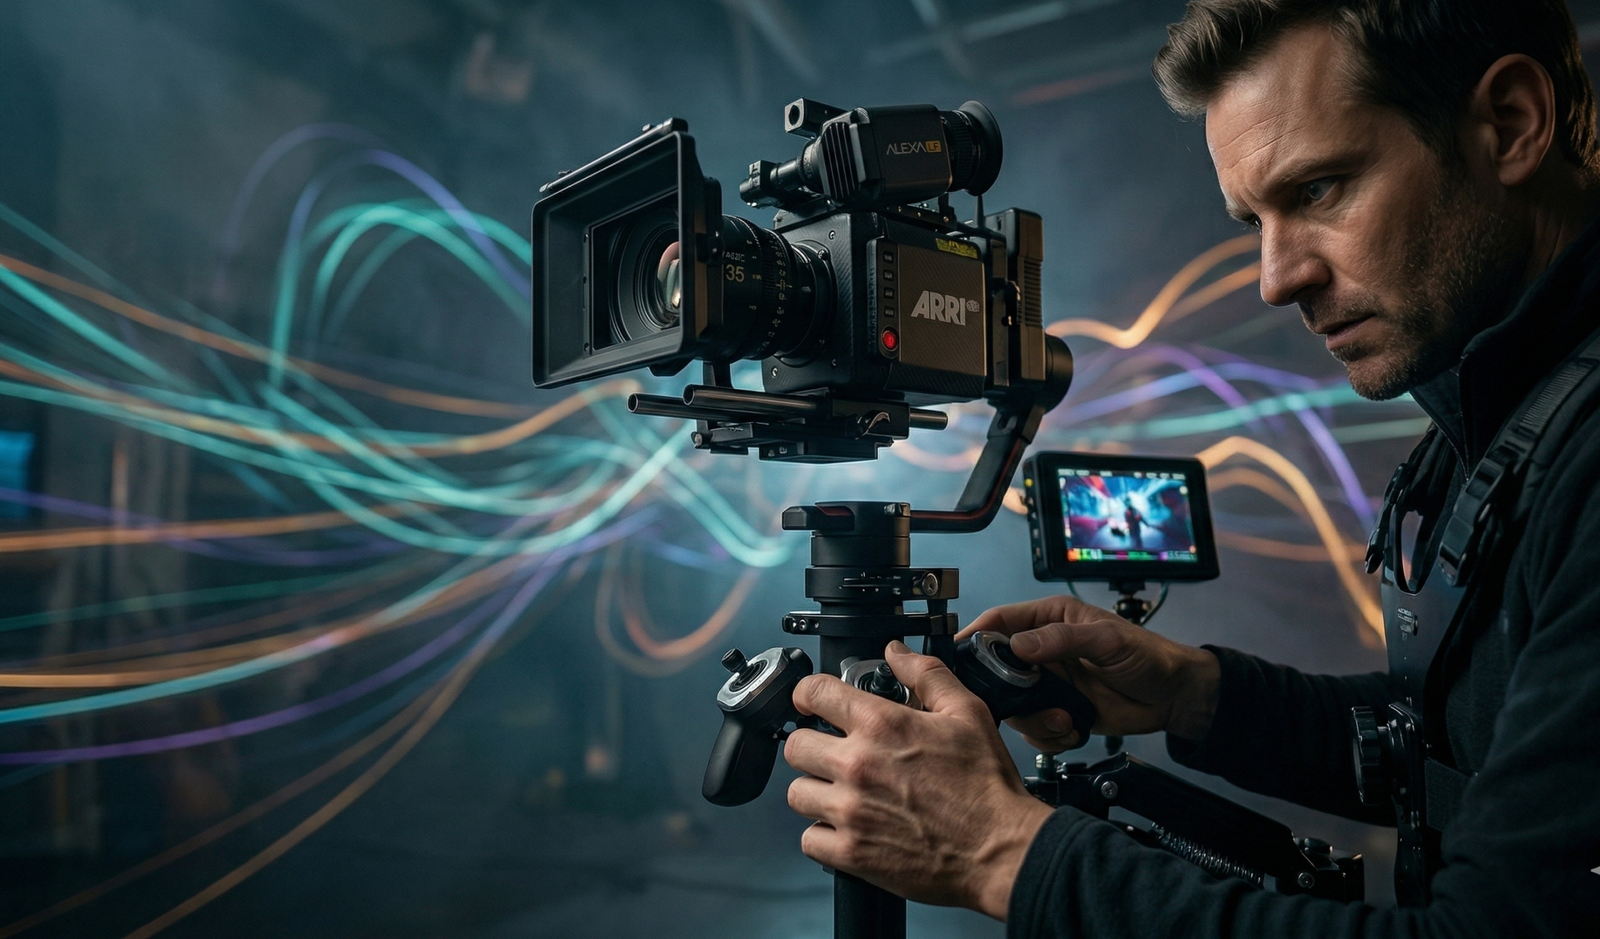
IX. Conclusion: Movement is Emotion
The Pan, Tilt, Dolly, and Boom are more than just technical settings—they are the heartbeat of your film. Whether you are using a $100,000 ARRI Alexa on a professional set or a mirrorless camera on a DIY slider, the principles remain the same.
Master the basic moves until they are second nature, then begin to experiment with unmotivated, layered choreography. Remember: the best camera movement is the one the audience doesn’t “see,” but the one they feel in the pit of their stomach.
Forge your own cinematic vision at Cinemastery Academy. Theory is only the foundation; true mastery requires a guided hand and professional insights. If you are ready to stop “shooting video” and start “creating cinema,” join our elite community of filmmakers.
Start your journey at Cinemastery Academy and unlock the full power of the cinematic language.
X. FAQ (People Also Ask)
Q: What are the 7 basic camera movements?
A: The most common seven are Pan, Tilt, Dolly, Truck, Pedestal (Boom), Rack Focus (optical movement), and Zoom.
Q: Can I achieve a dolly shot on a budget?
A: Absolutely. Use a wheelchair for smooth tracking shots, or place your camera on a towel and slide it across a polished wooden floor for a DIY slider effect. Skateboards and even shopping carts have been used on indie sets for decades.
Q: Is a gimbal better than a tripod?
A: Neither is “better”—they serve different narrative purposes. A tripod provides a sense of stability, control, and “objective” observation. A gimbal provides a sense of fluidity, energy, and “subjective” immersion. Choose based on the emotion of the scene.
Q: What is the difference between a Pan and a Truck?
A: A Pan is a stationary rotation (the tripod stays in one spot). A Truck is a physical lateral move (the entire camera assembly moves left or right).
Q: Why does my camera movement look “shaky” even with stabilization?
A: Often this is due to the “micro-jitters” of your hands or the “footstep hit” while walking. Practice the “ninja walk” (knees bent, rolling your feet from heel to toe) and ensure your gimbal is perfectly balanced before powering it on.